Shopify Storefront API
This article explores how Shopify, one of the leading platforms for eCommerce development, offers various tools to customize your online store. Did you know that there are developer tools that allow you to personalize every part of your eCommerce? One of these is the Storefront API. Here’s what they are and how to use them.
Today, it’s difficult to start a business without considering the internet. The development of online stores continues to grow, with even physical stores setting up online outlets.
Creating an eCommerce that matches the company’s identity and is easy for the user to navigate is essential: if a site visitor can’t understand how the menu is structured, how to view items in the cart, or see the details of a product, they’ll probably lose interest and leave the store.
It’s similar to entering a physical store and the salesperson not telling you where to find the item you were looking for.
So, if a site is difficult to use, sales could be affected.
What are Shopify’s Storefront APIs?
Shopify’s Storefront APIs allow you to access your store’s data, such as product data, collections, orders, customer data, and even the checkout.
They are used through GraphQL, a powerful and flexible query language (created for API use) and a runtime system, which processes the query and returns the requested data.
In practice, thanks to these APIs, it’s possible to create applications and integrations for your eCommerce, offering additional functionality at any stage of store operations.
Simply put, this tool allows you to access, modify, or even add information to your eCommerce as needed.
We’re talking about information related to products, collections, even customers, and orders.
Do you need to be able to add a particular product to the cart at checkout?
Or even insert data for a customer that’s not provided in the pre-set forms?
Storefront APIs let you go beyond the limits of Shopify’s interface and “liquid” objects, customizing the customer’s shopping experience.
What are Shopify’s Storefront APIs used for?
This powerful tool allows you to implement your site’s functionality—for example, adding a fee for a payment method that doesn’t have one by default—and even to call your Shopify store’s data from external sites.
The Storefront APIs offer the possibility to directly implement your theme files using GraphQL with JavaScript (even though GraphQL services can be written in any language), and to integrate Shopify into any sites outside the platform.
For this option, the Shopify team has created examples using React, Node, and Angular.

Rest and GraphQL
GraphQL works like REST calls, using the HTTP data transmission system, but in a more efficient, lightweight, and fast way:
- GraphQL allows you to define the structure of the requested data, so you don’t get an excess of information from the server and only receive what you need.
- Instead of accessing multiple endpoints to get different data, with GraphQL, you only need one endpoint to access all data.
- The data is typed and documented in GraphQL’s schema, or SDL (Schema Definition Language), where the relationships between data types and the operations you can perform on those data are described.
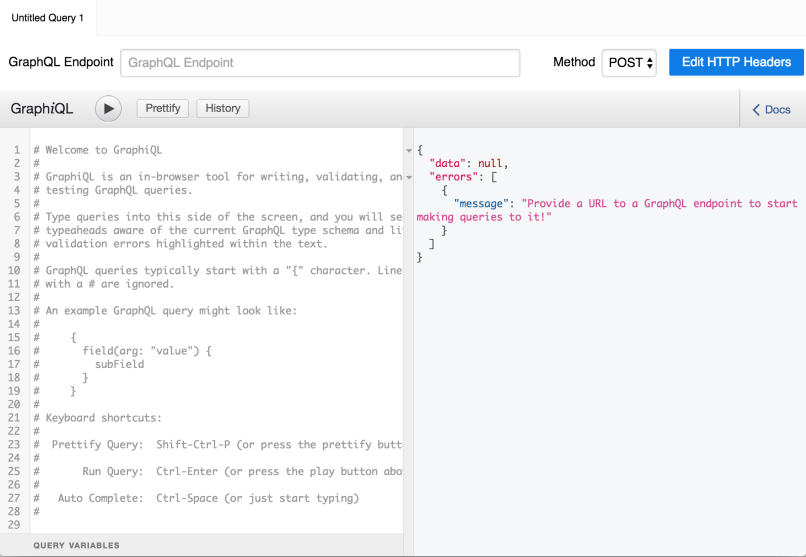
To get familiar with GraphQL, the GraphiQL tool is provided.
This tool is useful for debugging, or simply to test your queries before inserting them into the code, to check that the data received is what you need.
Shopify Access Token: how to obtain and configure it
To use GraphiQL or integrate Storefront APIs into sites external to Shopify, you need an access token.
This token can be obtained either through a private app in the Store or through the REST Admin APIs (to see how to obtain the access token through Admin APIs).
Here, we’ll use the token generated from the private app of our online store.
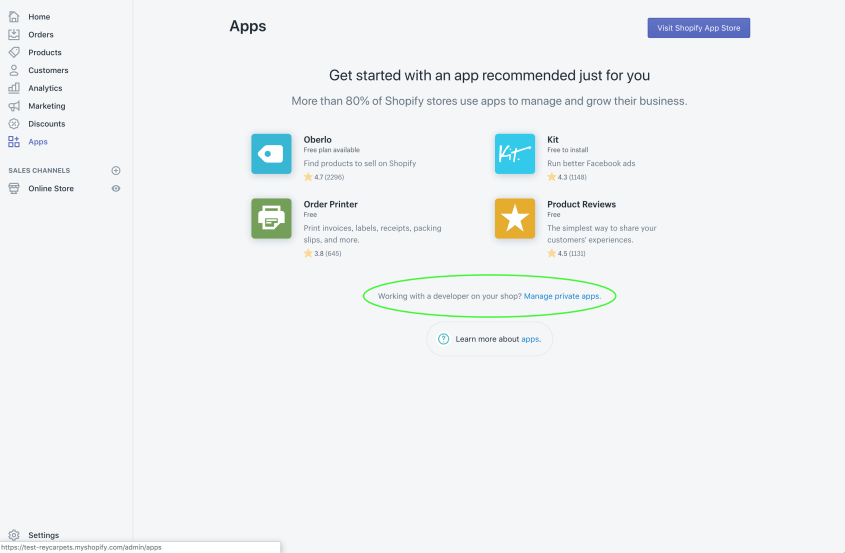
From your store, go to Apps -> Manage private apps -> Create a new private app.
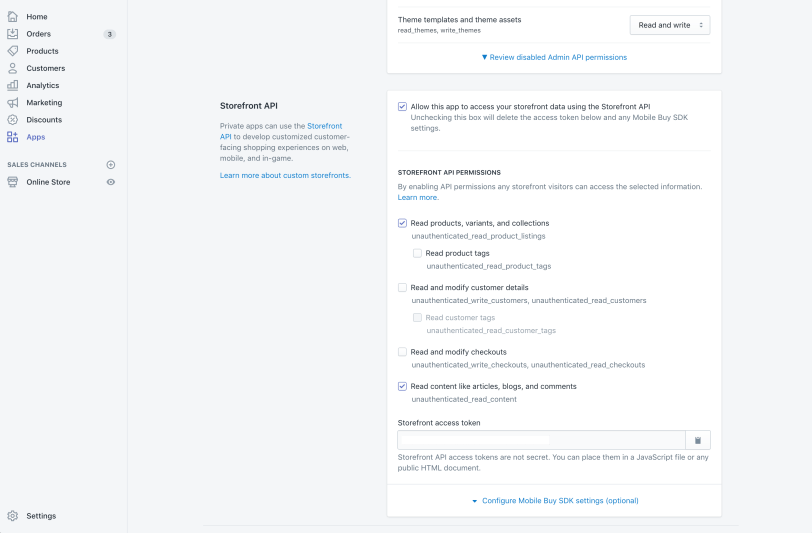
Once you’ve created the app with your credentials, check the box that says “Allow access to Storefront data via Storefront APIs” at the bottom of the page.
Once this box is checked, permissions for data access will appear below.
At this point, Shopify reminds you that, since the token can be easily found by external users, it’s best to limit access to data that can be reached through Storefront APIs.
Set permissions based on the functionality you want to implement, then save the new private app.
Future developments
Changing the access settings later may cause the private app to stop working, so it’s important to set the correct permissions from the start to avoid needing to change them later.
Once you have obtained the token, if you are on an external site or application, you need to pass it in the HTTP header along with the GraphQL endpoint when making server requests.
Even when using GraphiQL, you need to enter the token under ‘Edit HTTP Headers’ and include the GraphQL endpoint. After obtaining the access token, it’s a good practice to verify its functionality with GraphiQL by running a couple of test queries.
At this point, you can use your Shopify store’s data, for example, by making an AJAX request with JavaScript, using the access credentials (token and endpoint) and the query for the data needed for the feature you want to implement.